Since Apple added Matter support in iOS 16.1, you can now use a much wider range of smart home devices with Apple Home. Instead of being limited to HomeKit-only devices (Works with Apple Home), you can now choose from a growing range of Matter-certified products. Once a Matter device is added to Apple Home, you can easily share it with other Matter-compatible ecosystems such as Google Home, Amazon Alexa, Samsung SmartThings and more. No more being locked-in to a single ecosystem!
This guide walks you through everything you need to know about using Matter with Apple Home, from choosing compatible hubs to sharing devices across multiple smart home platforms.
Prerequisites to use Matter devices with Apple Home
To use Matter devices (or accessories in Apple’s terminology) in Apple Home, you will need the following:
- iPhone or iPad with the latest software (iOS 16.1 and later)
- Matter-compatible Home hub (see full list below)
With iOS 18, it is possible to control Matter devices without a Home hub. To control Matter over Thread devices without a Home hub, an iPhone 15 Pro and iPhone 15 Pro Max or later is required. For the best Apple Home experience, including remote access, advanced automations, and full feature support, setting up a Home hub is recommended.
Matter-compatible Home hubs
The following Apple Home hubs are Matter Controllers that will allow you to control Matter devices on the Apple Home app or Siri. All Home hubs support Matter over Wi-Fi and Matter over Ethernet devices, but only selected hubs support Matter over Thread devices.
|
Matter Controller |
|
 |
|
|---|---|---|---|
|
Apple TV 4K (3rd generation) Wi-Fi + Ethernet A2843 |
✓ |
✓ |
✓ |
|
Apple TV 4K (3rd generation) Wi-Fi A2737 |
✓ |
✓ |
|
|
Apple TV 4K (2nd generation) A2169 |
✓ |
✓ |
✓ |
|
Apple TV 4K (1st generation) A1842 |
✓ |
✓ |
|
|
Apple TV HD / Apple TV (4th generation) A1625 |
✓ |
✓ |
|
|
HomePod (2nd generation) A2825 |
✓ |
✓ |
✓ |
|
HomePod (1st generation) A1639 |
✓ |
✓ |
|
|
HomePod mini A2374 |
✓ |
✓ |
✓ |
Matter Protocols
Matter over Wi-Fi
Matter over Ethernet
Matter over Thread
Supported Matter device types
Apple Home app currently supports the following types of Matter accessories:
- Room air conditioners
- Matter bridges
- Lights
- Locks
- Outlets
- Switches
- Thermostats
- Window blinds and shades
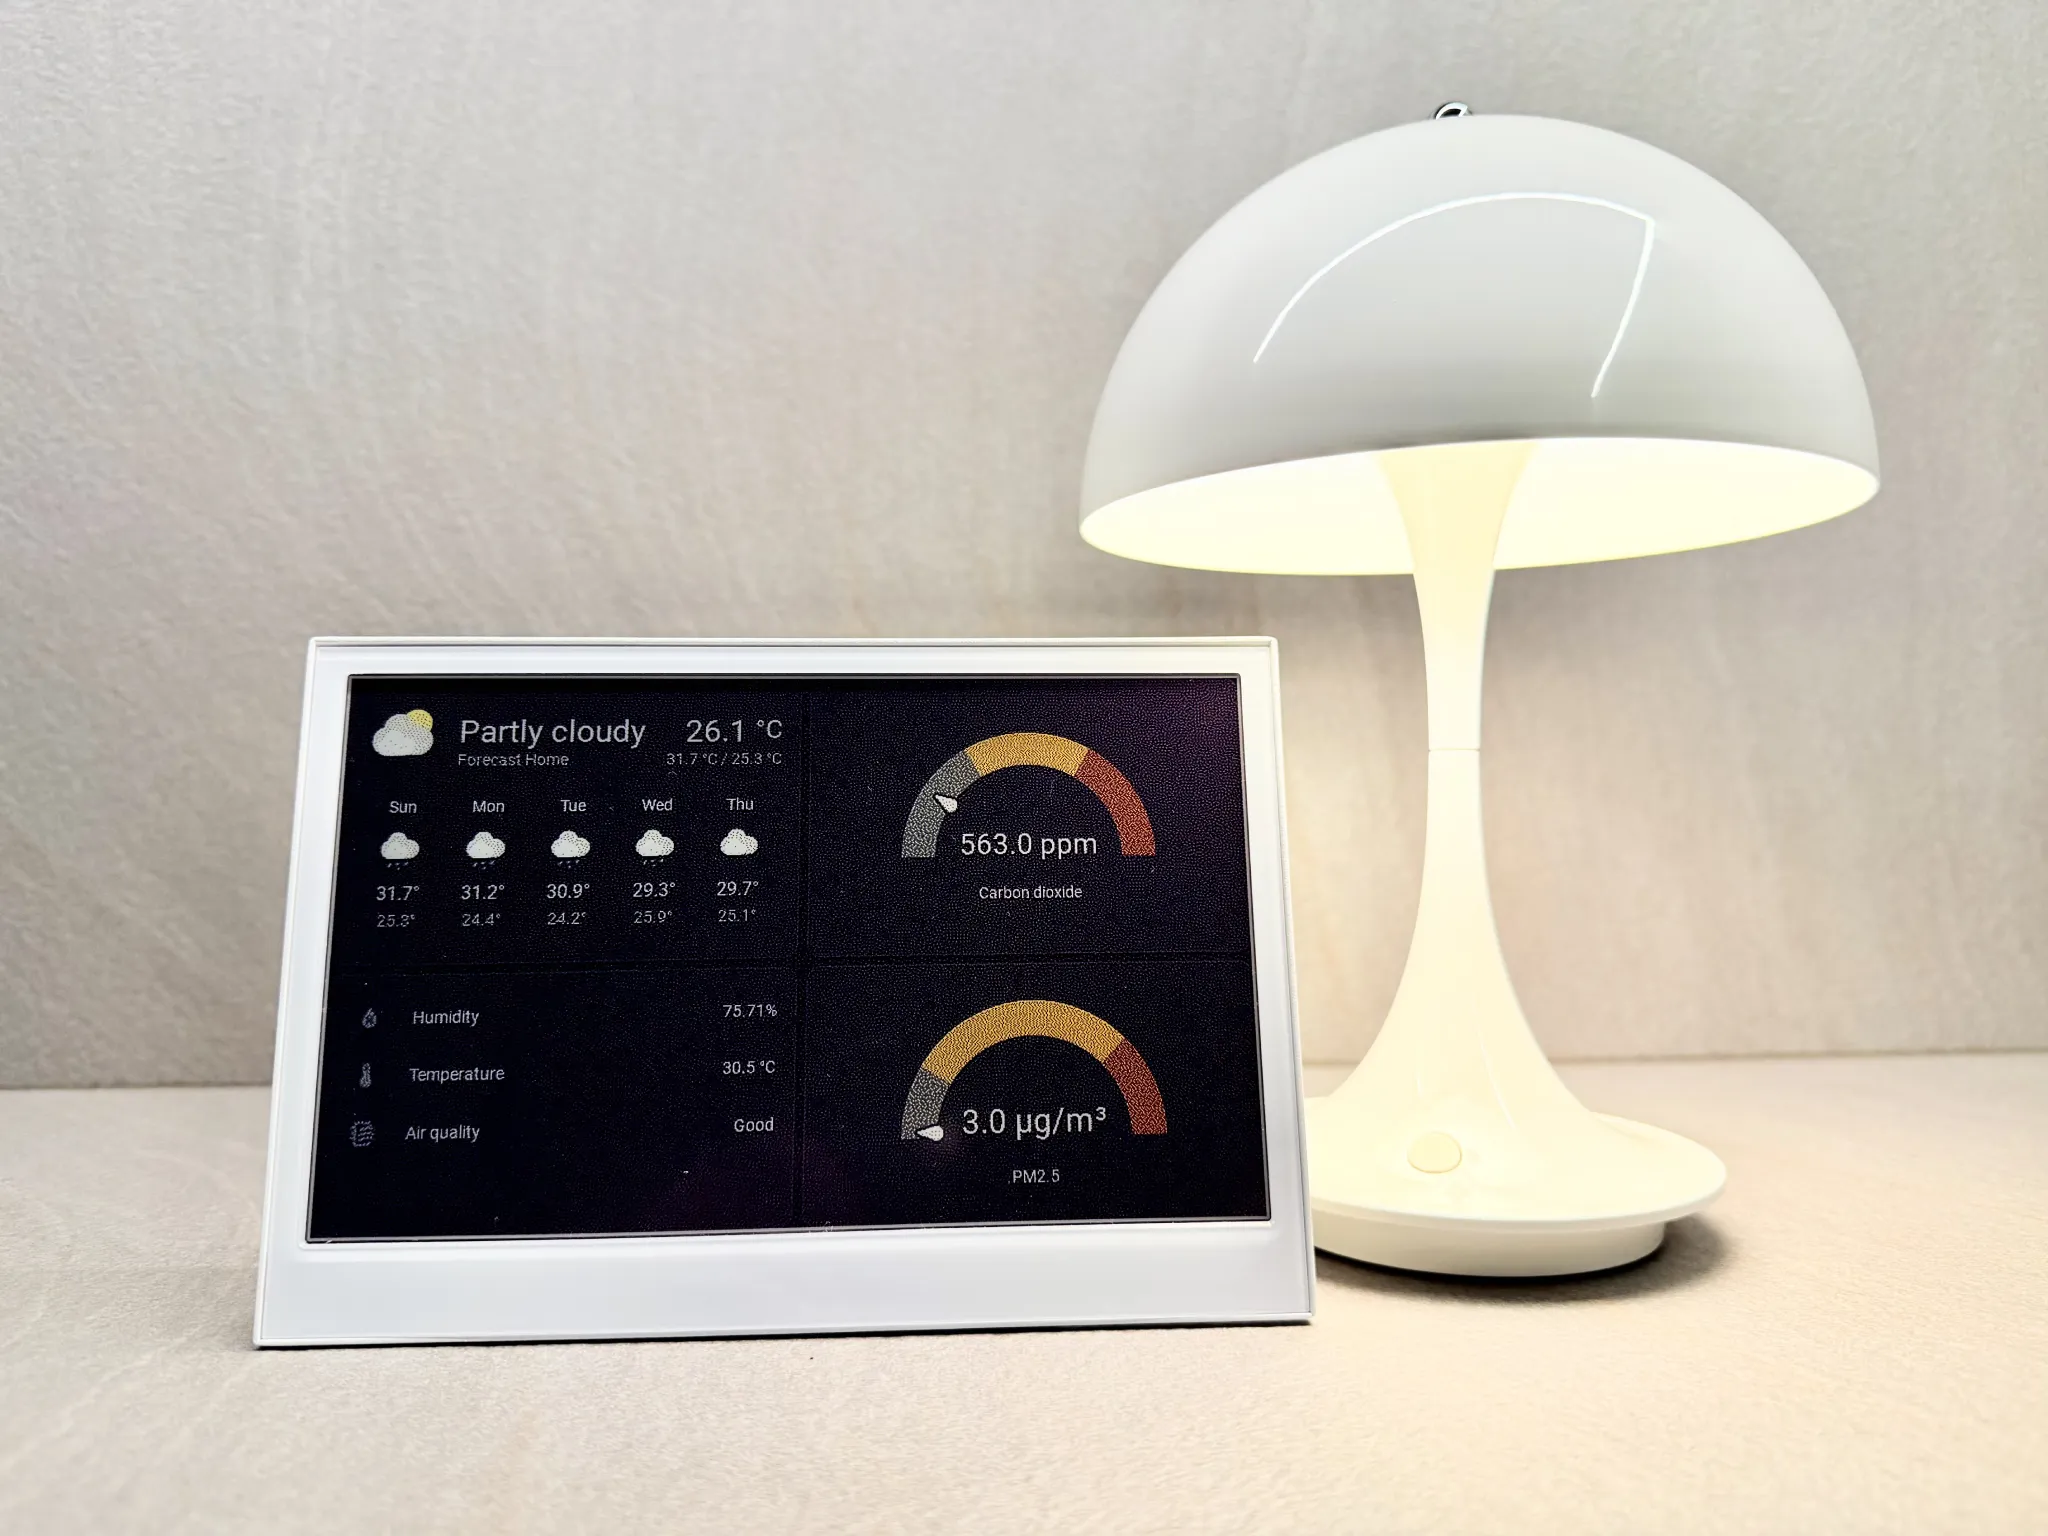
- Sensors (Motion, Ambient light, Contact, Temperature, Humidity, Smoke CO alarm)
- Robot vacuum cleaners
Note: As of this publication, Apple Home doesn’t support all Matter device types, though support continues to expand. Check Apple’s compatibility list for current device support.
Adding Matter devices to Apple Home
The following step-by-step guide will show you how to pair a Matter device to Apple Home. If a device is already paired with another ecosystem, you will need the setup code generated from the other ecosystem to add it to Apple Home.
Add a new Matter device
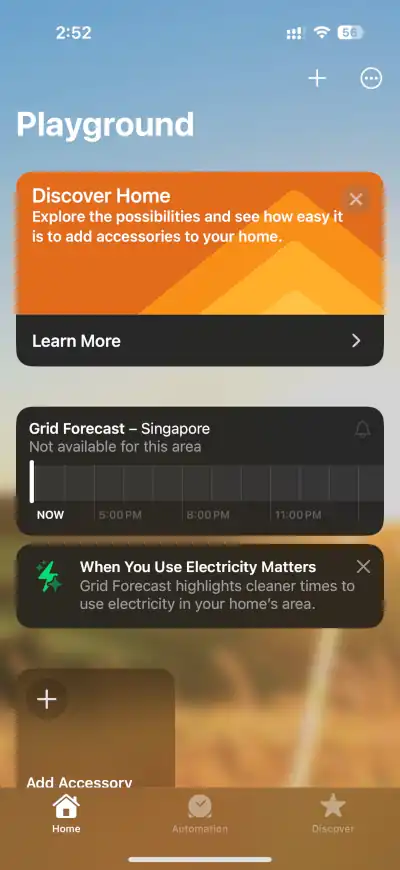
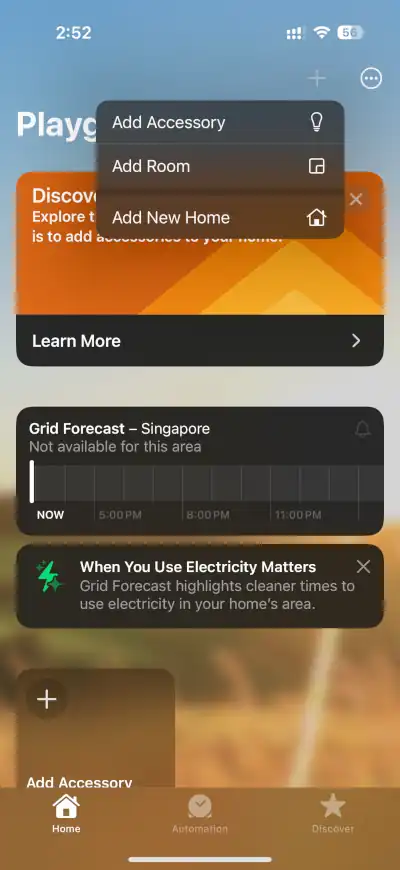
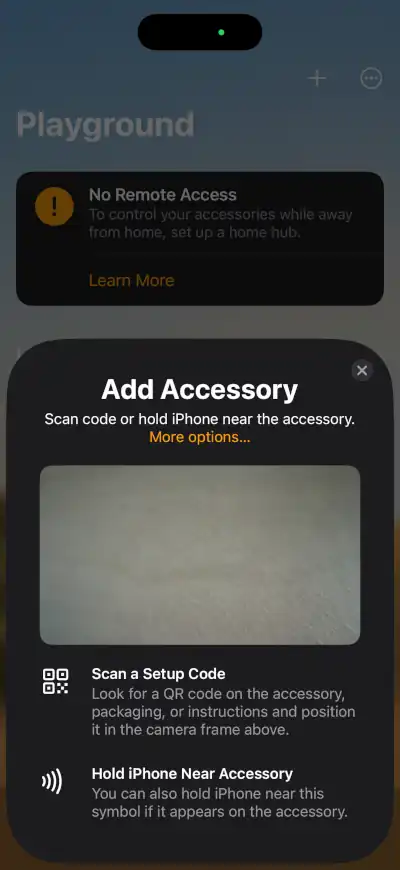
Open the Home app on your iPhone or iPad and tap ➕.
Tap Add Accessory.
Scan the Matter device’s setup code, typically a QR code attached to the device.
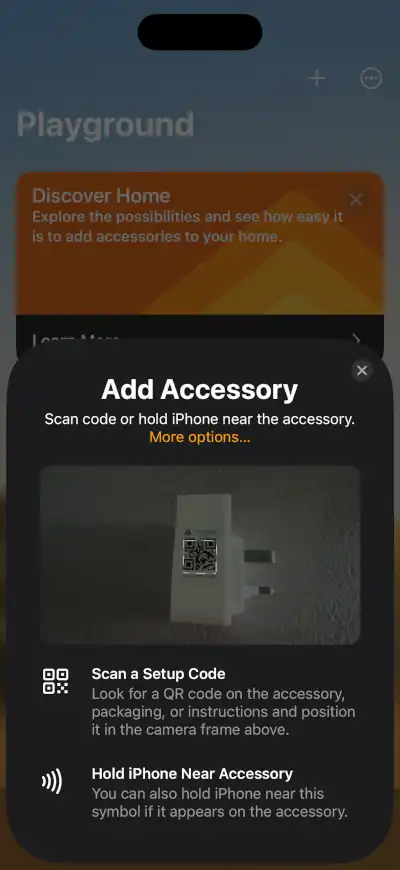
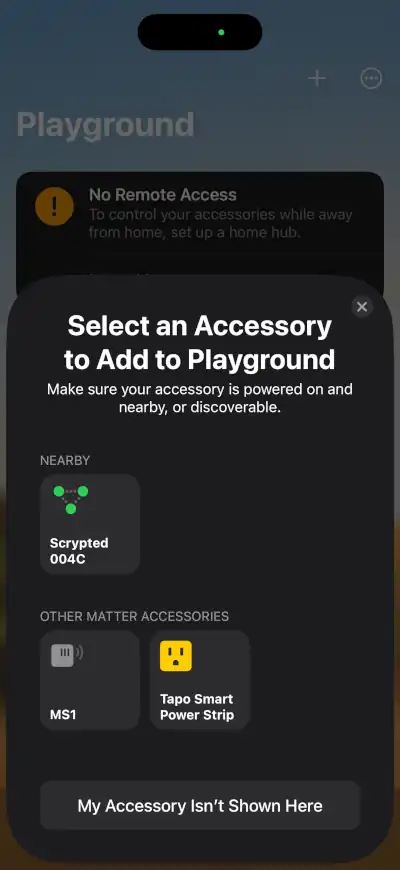
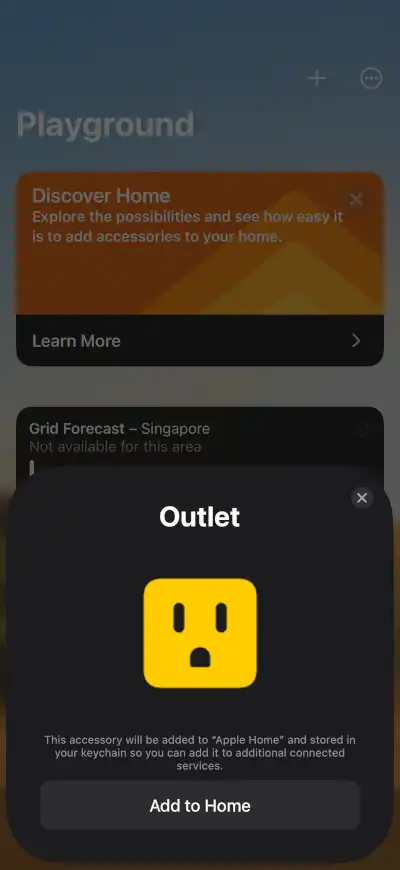
Tap Add to Home to start the pairing process.

Select a location for the device.
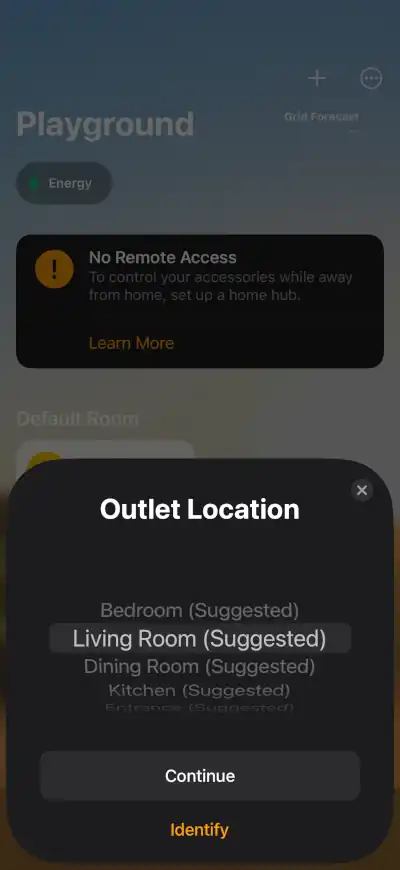
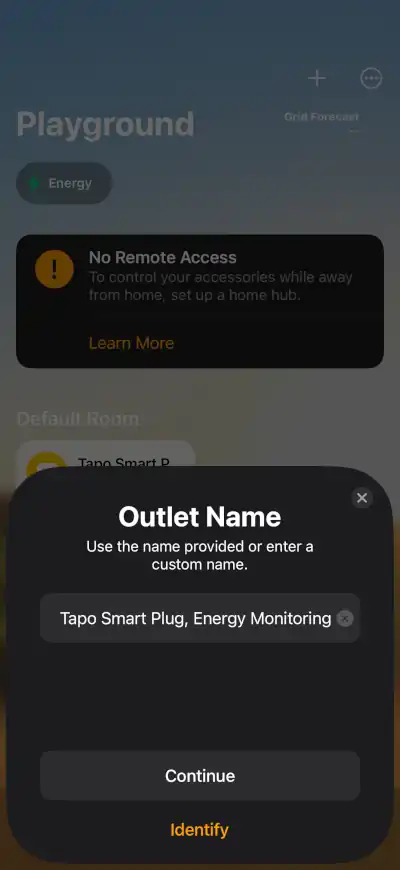
Name the device and select how it will appear (only for selected devices, such as outlets) to complete pairing.
Add a Matter device from other ecosystems
If a Matter device has been added to another Matter ecosystem, you will not be able to add that same device to Apple Home by scanning the setup code. Instead, you will need to generate a new pairing code from the other ecosystem and use the new code to add the device to Apple Home.
Once you have the new pairing code, tap More options… on the Add Accessory screen.
Tap the Matter device if it appears on the next screen. Otherwise, tap My Accessory Isn’t Shown Here.
Tap Enter code… on the Accessory Setup Help screen.
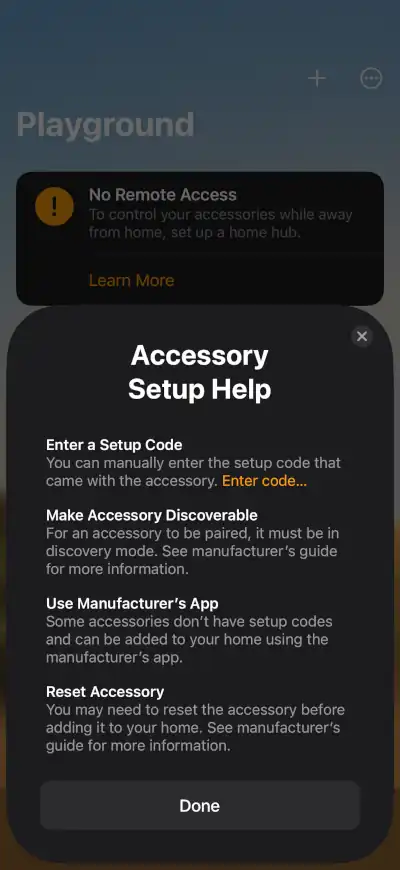
Paste the new setup code from the other Matter ecosystem.
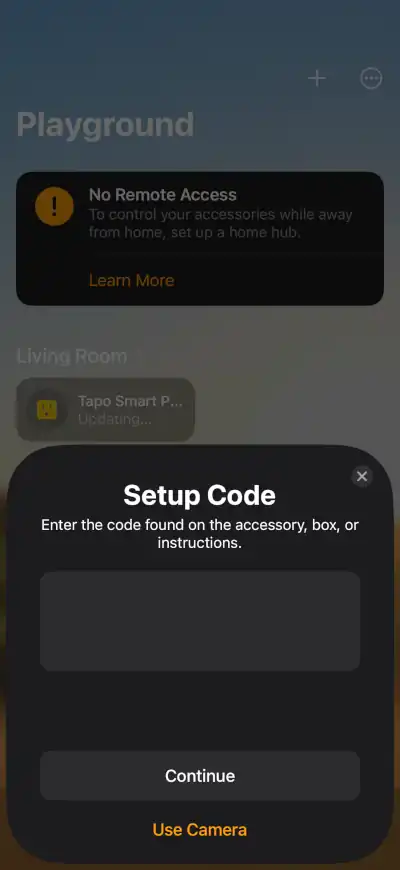
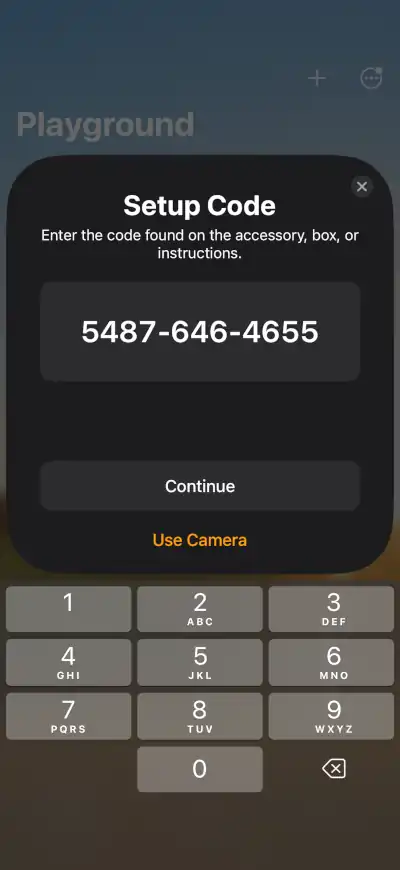
Follow the on-screen instructions to complete pairing.
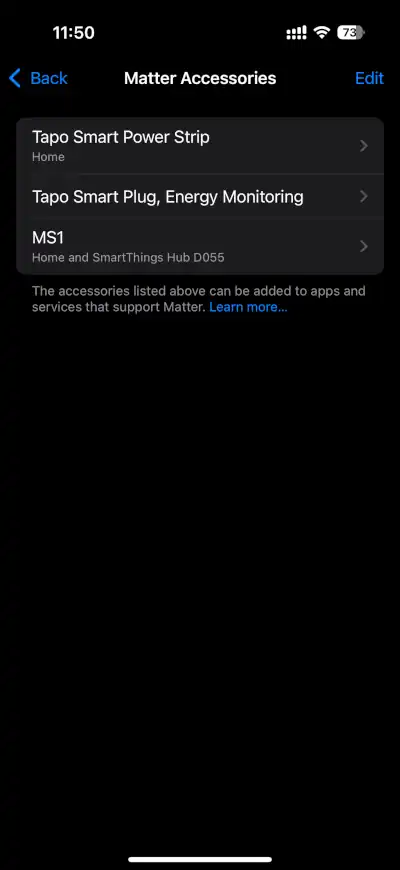
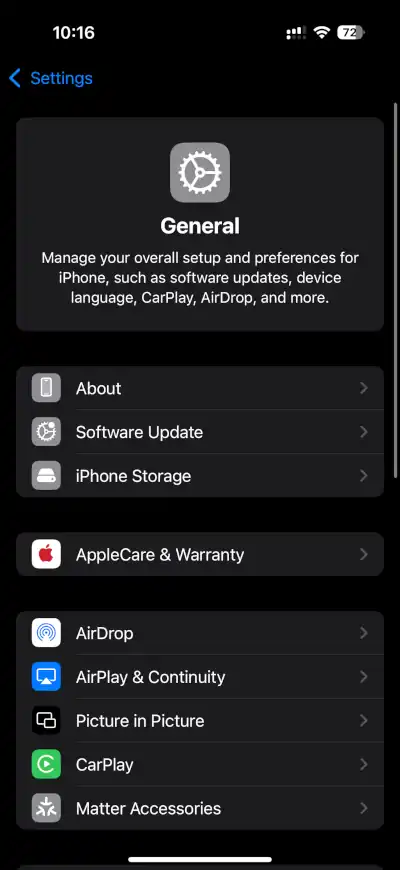
Once a Matter device is added to Apple Home, you can view it on your iPhone or iPad settings under General > Matter Accessories.
Sharing Matter devices with other ecosystems
One key benefit of Matter is the Multi-Admin feature, which allows a Matter device to be added to and controlled by multiple Matter ecosystems simultaneously. For instance, a Matter smart plug added to Apple Home can also be shared with Amazon Alexa, Google Home, Samsung SmartThings, and other Matter ecosystems.
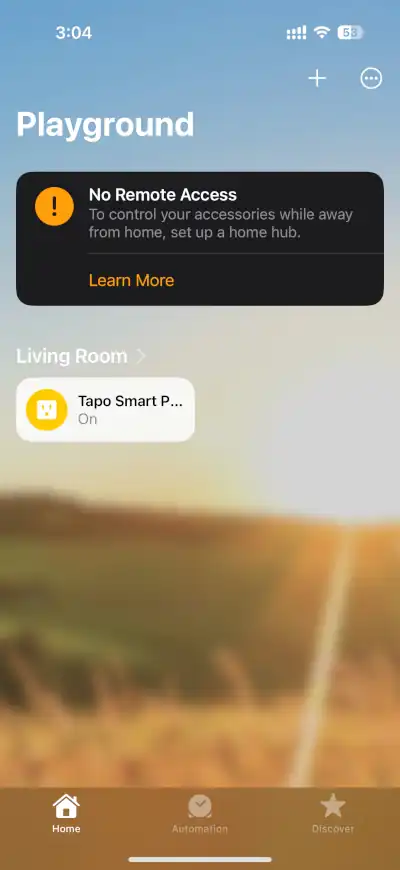
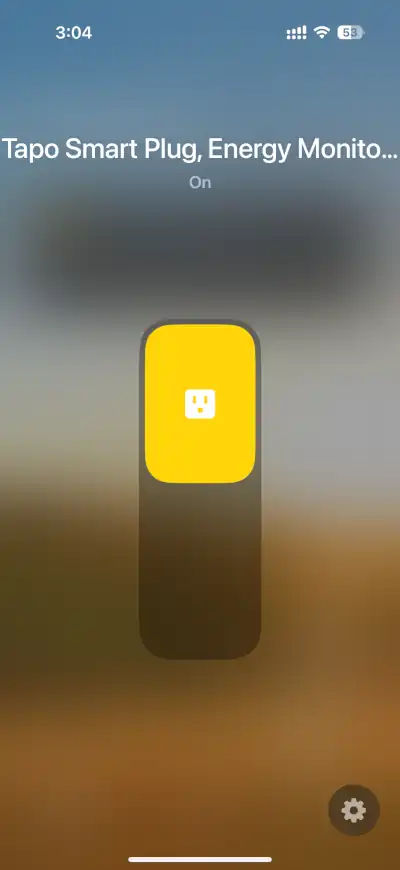
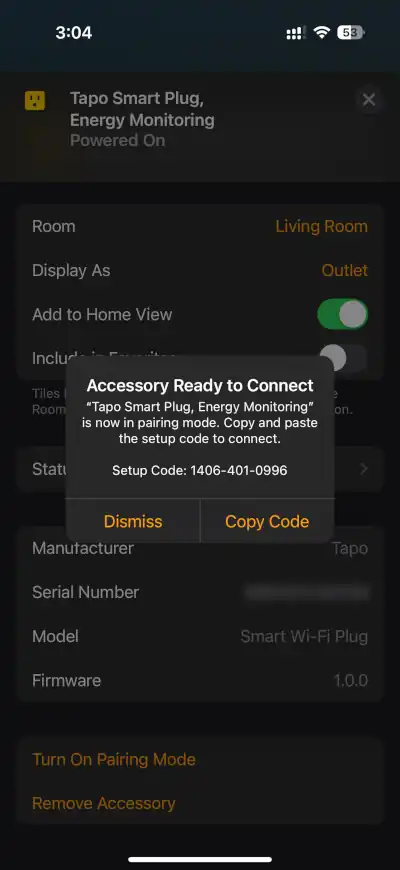
To share a Matter device from Apple Home, select the device on the Home app.
Tap the gear icon to access device settings.
Tap Turn On Pairing Mode.
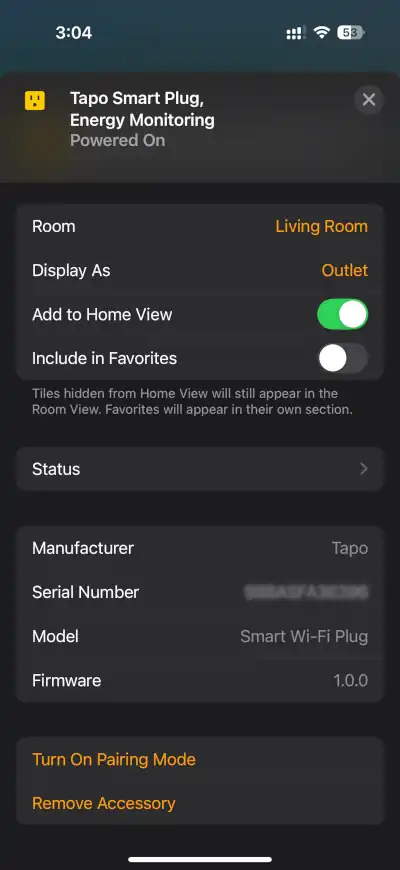
Once you see the Accessory Ready to Connect pop-up screen, tap Copy Code and use that to setup the device in another Matter ecosystem.
Troubleshooting Matter devices that won’t pair
Struggling to add a new Matter device in Apple Home? Most pairing problems are easy to fix with a systematic approach. Follow these steps to get your device connected.
Start with the Essentials
- Check Power and Range: Make sure your Matter device is switched on and, if battery-powered, has charge. Pairing often works best when devices are within range, so try and place it close to your Apple Home hub and the iPhone/iPad running the Home app.
- Ensure Your Hub is Ready: Confirm that your Apple Home hub (such as HomePod or Apple TV) is set up and connected to your home network. Device pairing typically requires an active hub, so double-check if your hub is powered on and responding.
Network Compatibility Checks
- Wi-Fi or Ethernet: For Matter over Wi-Fi or Matter over Ethernet devices, ensure the device is connected to your home Wi-Fi/Ethernet network. Avoid using a guest Wi-Fi network, as these often block the communication needed for device discovery.
- Thread: For Matter over Thread devices, ensure you have a compatible Thread Border Router switched on. The Thread Border Router acts as a bridge between the device and your home network.
Update and Restart
- Latest Firmware Matters: Smart device glitches often trace back to old firmware. Update your Matter device (using the manufacturer’s app, if applicable), Apple Home hub, network router, and Home app to their latest versions before retrying.
- Try Different Pairing Methods: If scanning the setup code doesn’t work, manually enter the numeric Matter code found near the device’s label. Sometimes restarting the affected devices (Home app, hub, router) resolves stubborn issues.
- Factory Reset as a Last Resort: For devices that still won’t pair, follow the manufacturer’s reset instructions to start fresh before another setup attempt.
When All Else Fails
If the device still won’t connect after attempting the steps above, you might have a more complex network issue, or the device itself could have a problem. At this point, check the manufacturer’s website for specific troubleshooting tips or contact their support team for help.
Removing Matter devices from Apple Home
You can remove Matter accessories from iCloud Keychain, individual connected services (Google Home, Amazon Alexa, Samsung SmartThings, etc), or all connected services.
Remove from iCloud Keychain
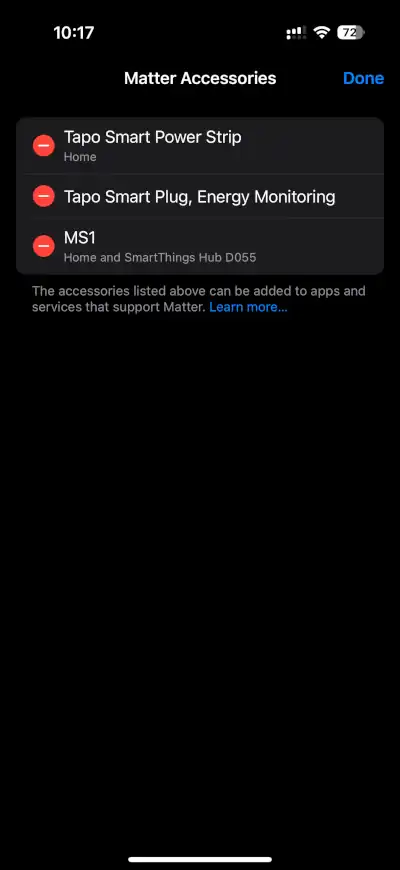
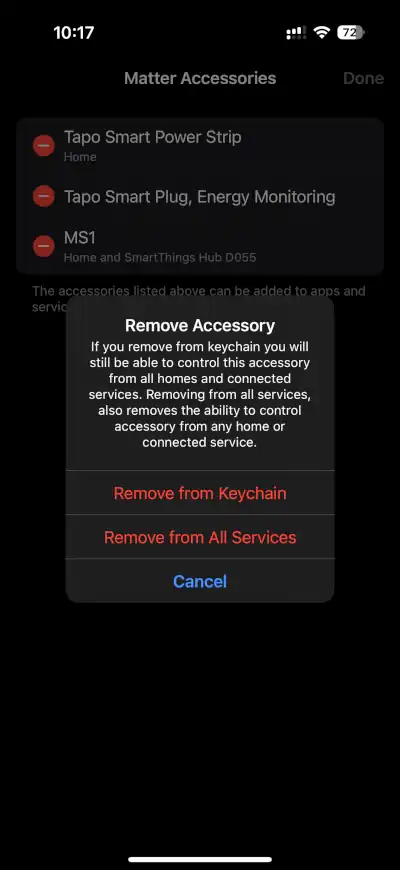
Open your iPhone or iPad settings and select General, then Matter Accessories.
On the Matter Accessories screen, tap Edit.

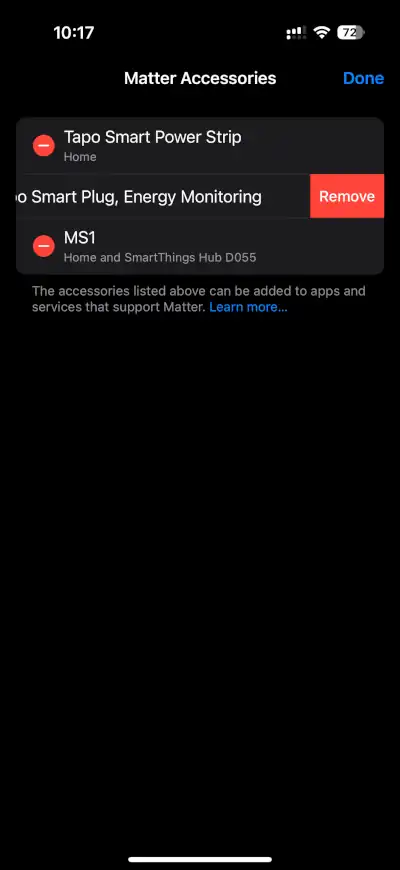
Tap the Delete button next to the accessory that you want to remove.
Swipe or tap Remove to confirm that you want to remove the accessory.
Choose Remove from Keychain.
Remove from individual connected services
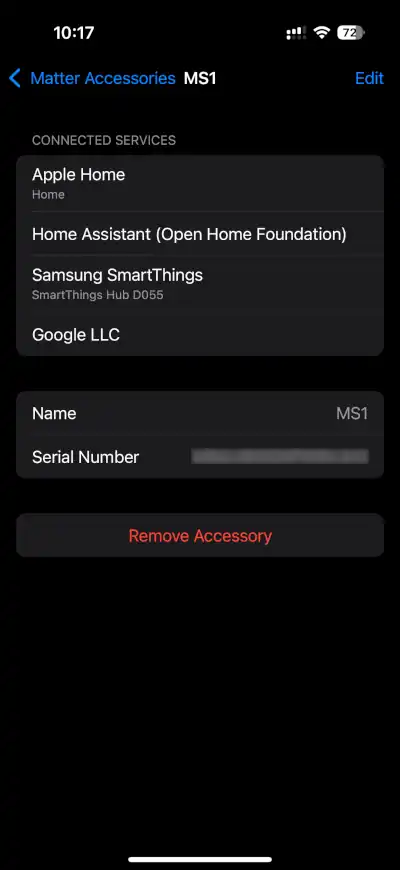
On the Matter Accessories screen, tap an accessory.
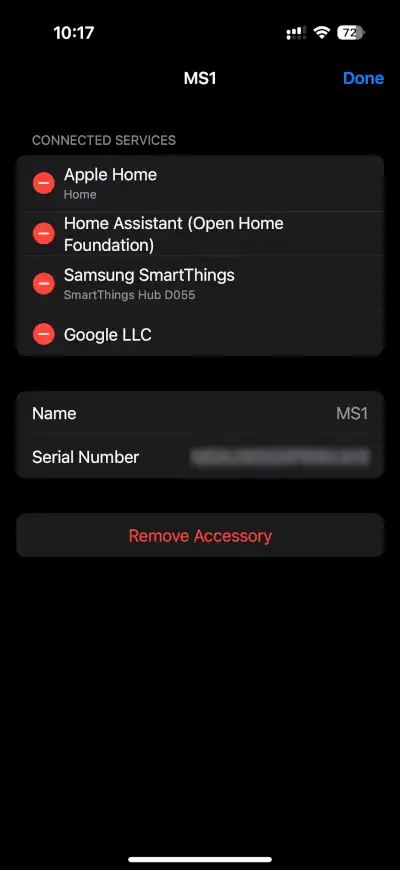
Tap Edit.
Tap the Delete button next to the accessory that you want to remove.
Swipe or tap Remove to confirm that you want to remove the accessory.
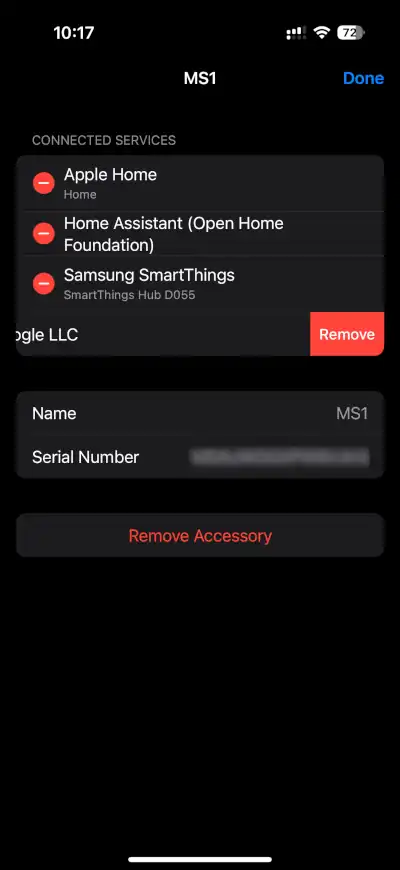
Tap Remove from “Connected Service” to confirm the removal.
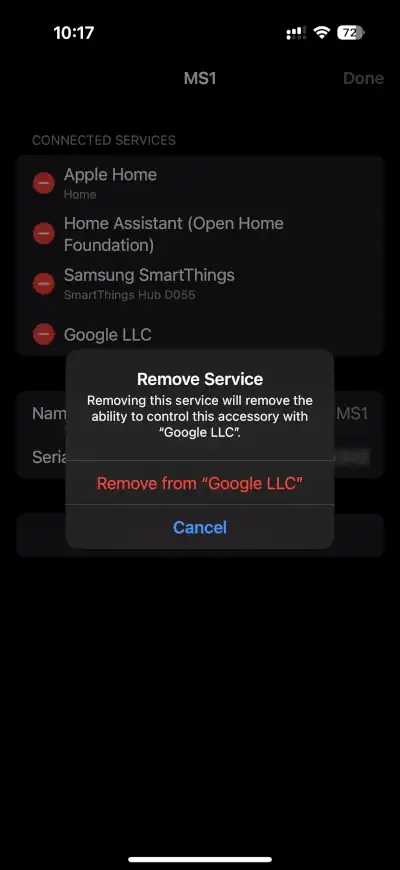
When you remove an individual connected service (e.g. Google LLC), you lose the ability to control the accessory from the app associated with that service (e.g. Google Home).
Remove from all connected services
On the Matter Accessories screen, tap Edit.
Tap the Delete button next to the accessory that you want to remove.
Swipe or tap Remove to confirm that you want to remove the accessory.
Choose Remove From All Services.
When you remove an accessory from all connected services, you lose the ability to control the accessory from each app associated with each service on your iPhone or iPad.


Leave a Reply